Sunday, August 11, 2019

How to Get Rid of Dark Spots With 9 Easy Tips


Ways to Fade and Remove Dark Spots on Your Skin


As you age, you realize that wrinkles can make you look much older than you really are. But there are other culprits that can add years to your appearance. One of these is getting dark spots on your skin.

Fortunately, there are home remedies, topical products, and cosmetic procedures that could effectively fade or permanently remove dark spots. Below, I am sharing with you the most common treatments.

How to Get Rid of Dark Spots

1. Apply Lemon Juice

Lemon juice's acidity acts like a bleaching agent and helps reduce discoloration on your face.1 Use a cotton ball or Q-tip to apply the juice onto your liver spots twice a day. It is a good idea to test this first on a small area of your face to see how your skin will react to the lemon juice. If you have sensitive skin, I recommend diluting the juice with a bit of water.

2. Use Aloe Vera Gel

The gel of the aloe vera plant is chock-full of antioxidants like vitamins A, C, and, E, which help to reduce brown spots and even out skin tone.2 Vitamin A speeds up your skin's natural shedding process, vitamin C brightens your complexion, and vitamin E renews the epidermis. Aloe works especially well if you have dark spots caused by sun exposure because the plant has been used for thousands of years to relieve sunburns.

You can buy 100% aloe vera gel at a health food store, but using gel directly from the plant is preferable. To do this, cut off a piece of an aloe vera leaf and split it in half. Carve out the jelly-like flesh and apply this directly onto your skin.
Aloe Vera gel can be used to treat liver spots.

3. Yogurt or Buttermilk


These diary products contain high amounts of lactic acid, which lightens and exfoliates the skin. You can apply yogurt or buttermilk directly onto your skin like a mask and leave it on for 20 minutes before washing it off.3

4. Apple Cider Vinegar


Rich in antioxidants and minerals, apple cider vinegar is a popular home product used for treating all sorts of ailments. Those with scarring and pigmentation swear by this simple remedy because the alpha hydroxy acid gets rid of dead skin cell.4

Mix equal parts apple cider vinegar and water. You can apply this over your entire face because it is pH balanced, so it acts as a toner. However, if you detest the smell, let the solution sit for 20 minutes before rinsing.


Saturday, July 27, 2019

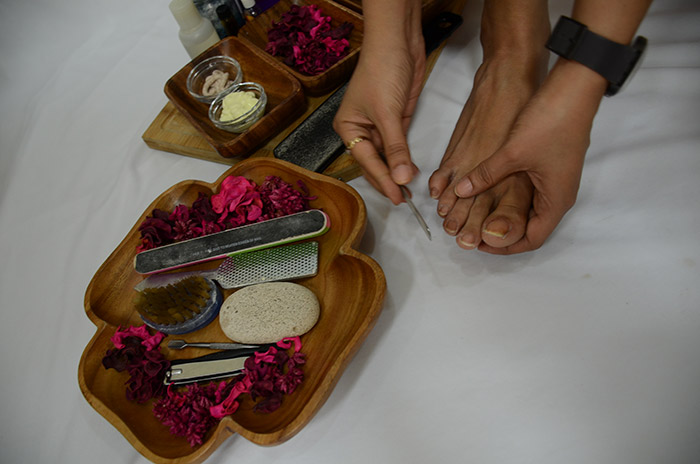
How To Do A Pedicure At Home


Did you know that your feet can tell a lot about you? It goes without saying that well-groomed feet are the mark of a proud and confident woman, and the opposite is not. But guess what? You don’t have to spend time and money to get beautiful feet; all you need to do is follow 5 easy steps for a DIY pedicure at home.

Steps To The DIY Pedicure

Prep Your Nails
Soak Your Feet
Scrub Your Feet
Moisturize Your Feet
Glam Up Your Nails
You Will Need
A Tub Of Warm Water
Bath Salt/Shampoo
A Good Foot Scrub
Nail clippers
Cuticle Pusher
Nail File
Pumice Stone/Foot File
Nail Scrubber
Nail Polish Remover
Cuticle Cream
A Clean Towel
Moisturizer
Cotton Pads


How To Do A Pedicure At Home
1. Prep Your Nails


Using a nail paint remover, remove the old nail polish with a cotton ball/pad.
Then, clip your nails using a nail cutter, but make sure you cut across straight. Don’t cut corners too deep, or you will end up with painful ingrown nails.
Decide the shape of your nails (square, oval, pointed, or squoval) so that you can file them accordingly.

Use a nail filer to shape the nail to the desired shape. Do the filing with enough force to reshape the nail, but be gentle enough not to weaken them. Resist doing the back and forth motion across the tip of the nail, as it will weaken them. Instead, file in a single direction to get the desired shape.
[ Read: Pedicure Tips That You Must Not Forget ]


Back To TOC

2. Soak Your Feet

How To Get Glowing Skin In 7 Days – With Instructions


Perfect skin. Find me one woman who does not want it. But why does it seem like flawless skin is too much to ask for? Trying to get your skin to cooperate with you almost always feels like a series of never-ending battles against zits, dark circles, pigmentation, patches of dry and lifeless skin, blackheads, and – oh, how I wish the list ended there! To top it all off, it doesn’t matter if you don’t have to deal with any of these issues right now. Chances are if you do not pay attention to your skin, one of them are bound to come knocking on your door with the others not too far behind. Pretty daunting, huh?
g, and Moisturizing routine, it still is majorly underrated. If you haven’t been doing it already, today is when you start, and once you do, you’ll not want to stop.

Your face is always collecting gunk from the pollution and dust it is exposed to, and the dead skin and natural oils that accumulate on it. Using a gentle cleanser to remove this buildup will unclog your pores, preventing issues like acne. The choice of cleanser depends on your skin type and what suits it best. Using a toner after proper cleansing will ensure that no residual oil or dust remains on the surface. Natural toners like rose water, green tea, and white vinegar work well to restore your skin’s pH balance while tightening your pores. End the routine with a good moisturizer. This is the base of any skin care routine.
Follow this up by applying a brightening face pack onto your face. You can whip up your own pack with ingredients like papaya, lemon, honey, milk, and tomatoes, which are readily available in most kitchens.
You need to remove any makeup you have on before you go to bed. Your skin needs to breathe at night, which is impossible with makeup on. A good way to remove makeup would be to apply a few drops of baby oil on your face and gently massage it for a couple of minutes. Once the makeup has come loose, you can dab it off with a cotton pad, towel, or tissue.
End your day by repeating the CTM method. Finish with your regular moisturizer and a good eye serum. If you have dry skin, it would be a good idea to switch up to satin pillow covers that will minimize moisture loss. Always try to sleep on your back with your face up and invest in a good humidifier to keep your face hydrated.\

Day 2
Your second day should focus on improving the health of your skin by controlling what you consume. Your skin can only work with what it has in terms of nutrition. While external care is crucial, internal care cannot be neglected. Eating right is a sure shot way to get skin that glows with health.


Follow up your morning cleanse-tone-moisturize routine with the application of a fruit mask. Fruit masks are easily prepared and applied. You can use ingredients suited to your skin type such as bananas for dry skin, and strawberries for oily skin. This is an excellent way to brighten up your face without using chemicals.
Keep yourself hydrated by consuming water and nutrition packed beverages throughout the day. This will help control the production of oil on your face and also tighten your pores.

Remove your makeup and end your day with the CTM method and your night-time skin care routine.
Day 3
On the third day you will be exfoliating to remove any dead skin. This will leave your skin feeling soft and looking radiant. It will also make your skin more receptive to the other treatments it will be receiving.

Cleanse your face with an exfoliating scrub or a face sponge. Scrub off the dead skin cells to reveal the healthy layer of skin underneath.
After the exfoliation, tone and moisturize your skin to keep this new layer protected from drying out. You can apply a face mask post exfoliation as your skin will be more receptive to nourishment.
Never forget to use sunscreen when you are about to step out into the sun. This will keep your skin protected from the harmful UV rays that can cause damage to your skin.
In the evening, modify your CTM ritual by applying a face pack after you cleanse your face. Once you wash the pack off, follow it up by toning and moisturizing.